Embedding content in Schoology may sound complicated, but it is actually a very easy way to create interactivity using outside tools without learners having to leave our learning management system. Using embedded content in your learning design is one way to control the amount of clicks a learner must take to get to your content. There are a few ways to accomplish this, including adding directly from Google Drive. This article will address adding links set to be viewed in Schoology and by using an embed code.
Setting Links to be Displayed in Schoology
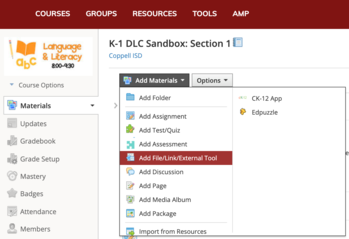
One of the easiest ways to "embed" a resource into Schoology is to use the "add file/link/external tool" option from the add materials menu in a Schoology course or group.
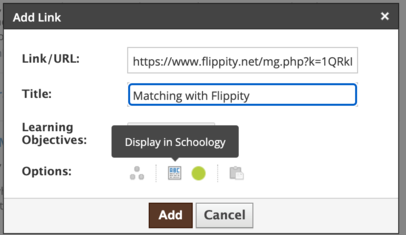
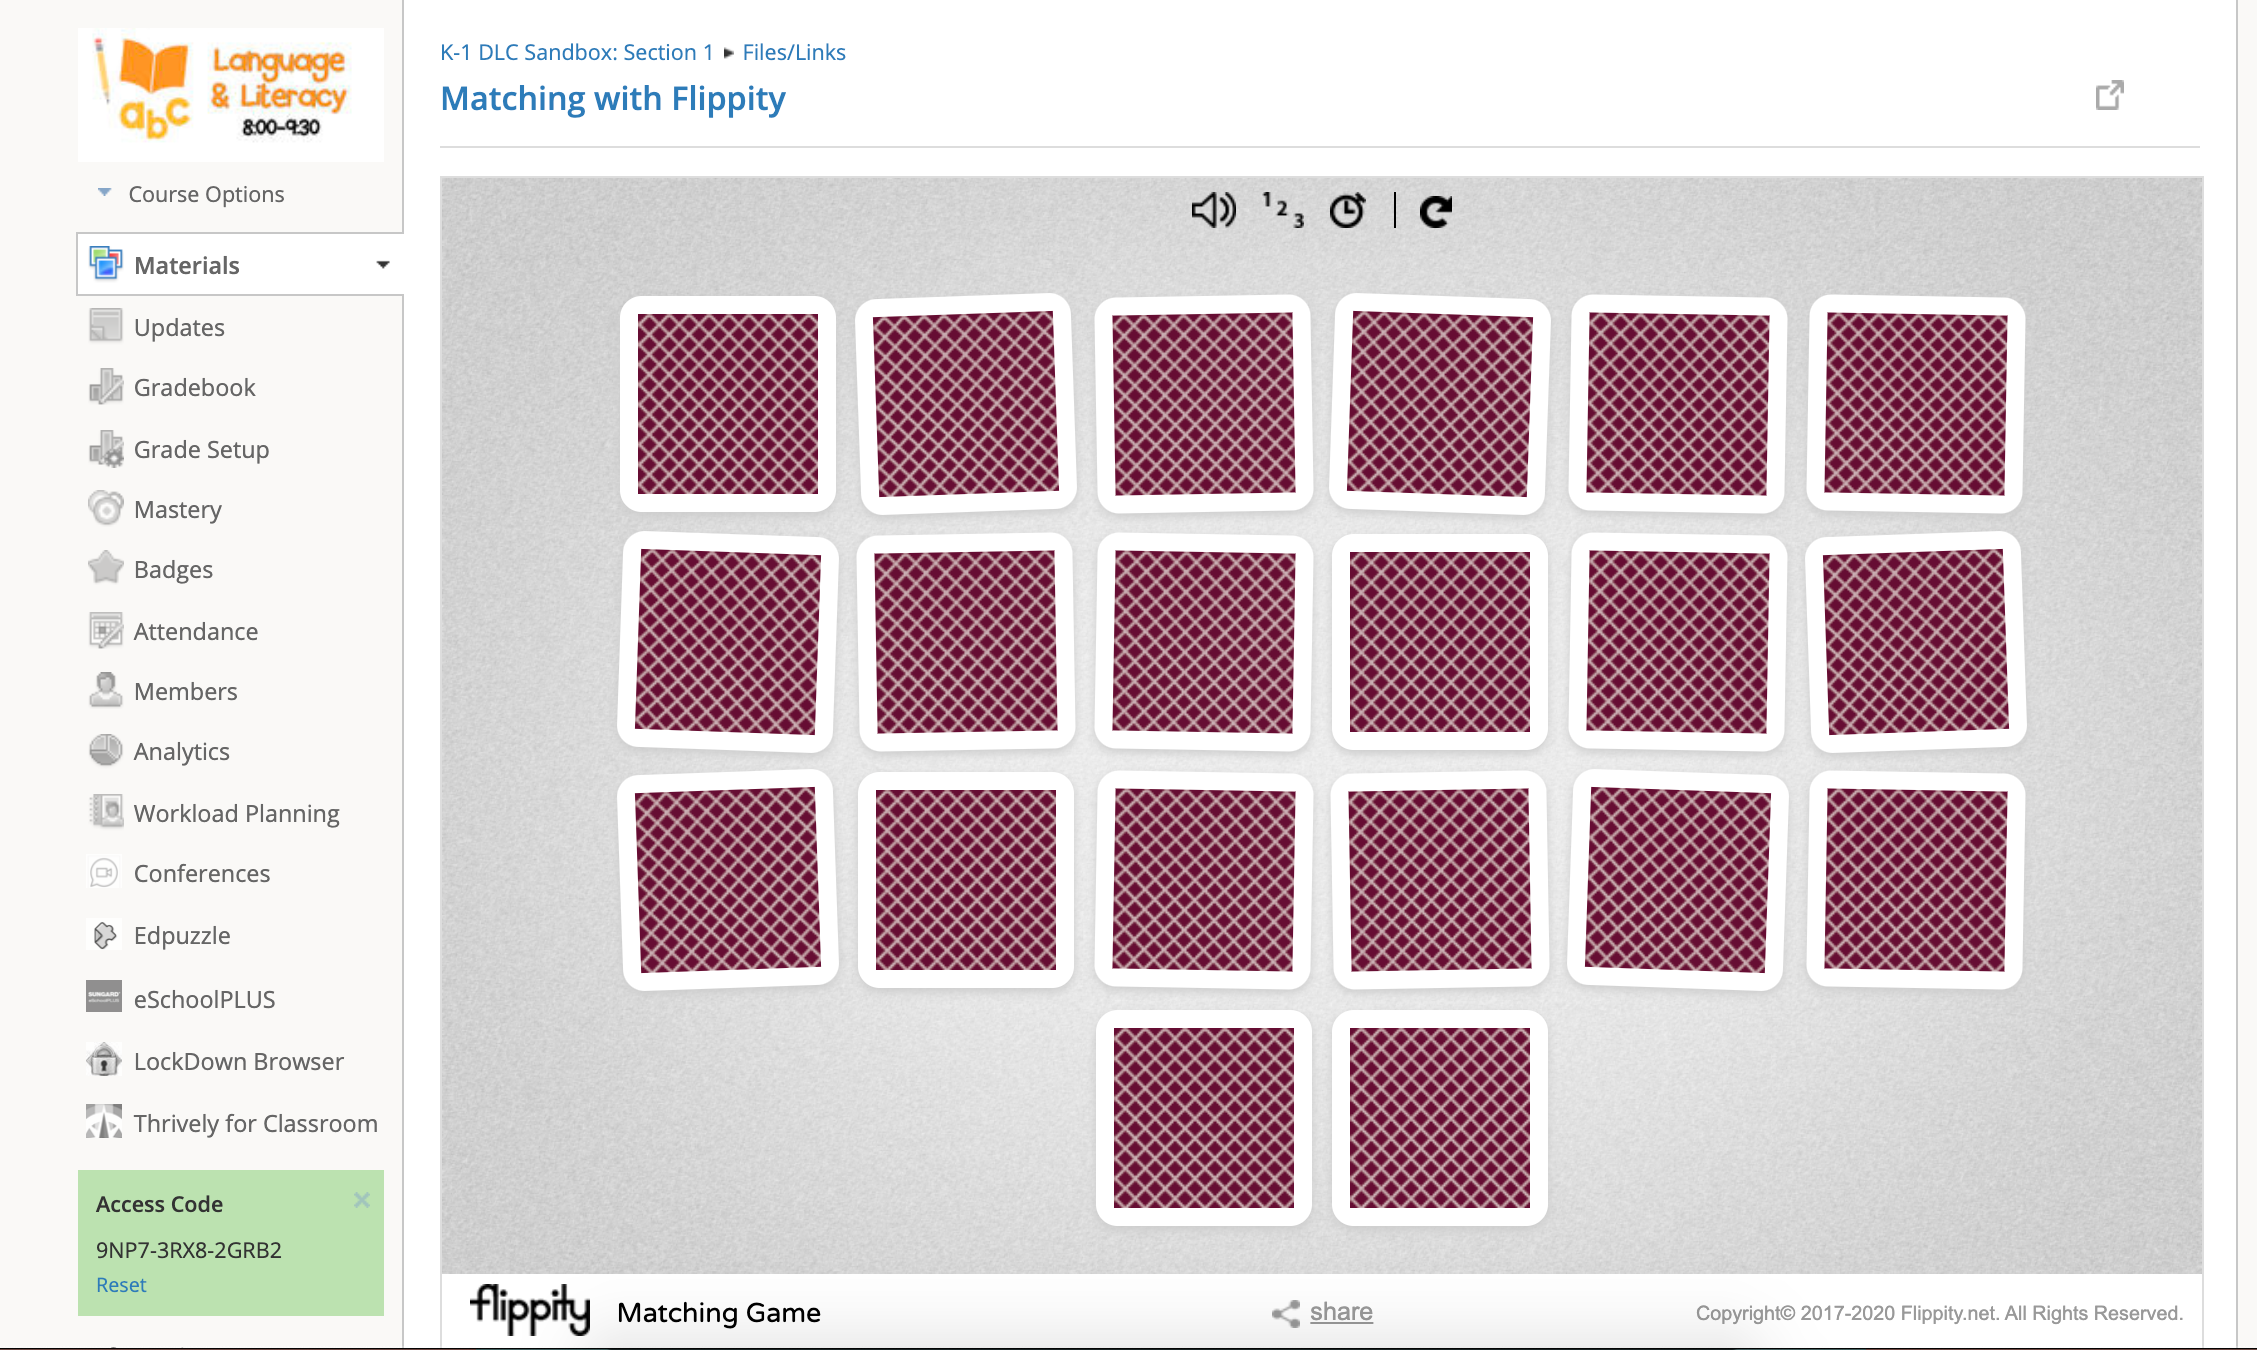
When you choose the link option, it's as easy as copying and pasting a link. Links in Schoology can be set to either "display in Schoology" or "display in a new window." Displaying in Schoology mimics an embed code and eliminates learners having to leave Schoology to go to the other site.
Here is what an embedded website could look like inside of Schoology:
Using an Embed Code
A few weeks ago, I played around with embedding a set of spinners into an assignment in Schoology. My purpose was to make the assignment more visual and to create a one-stop shop for the task at hand. What I learned is how easy it can be to embed content using an embed code. The video below outlines my process.
It was very easy on Wheel Decide to copy and paste the embed code directly from the site to Schoology, but what if you are trying to use a site that doesn't give you the option of copying the embed code and you still want to add it to show in an assignment or discussion in Schoology?
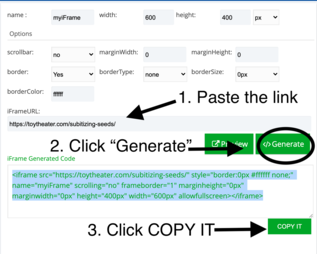
A simple solution is to use a site like iFrame Generator to generate the code. Find the link to the interactive site you want to use and head over to iFrame Generator. Then, follow the steps in the image to the right to copy the code!
When you return to Schoology, one option would be to toggle to the HTML editor (as shown in the video above) and paste the code.
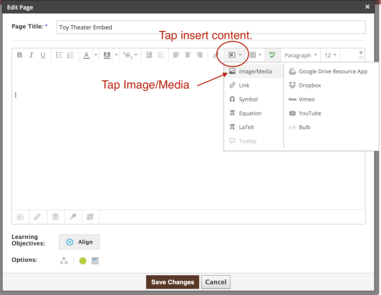
The best news is that Schoology provides an even easier way to add your code. On a discussion, assignment or page, simply tap on the insert content icon (the "squarrow") and choose Image/Media.
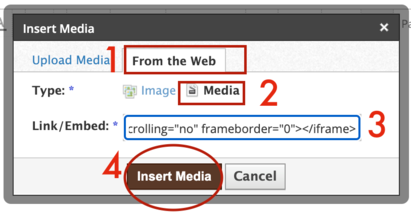
Then, follow these steps:
Toggle to "From the Web".
- Choose Media
- Paste your embed code.
- Select Insert Media.
Interactive Resource Examples
There are many different interactive sites out there. My best advice is to always test on an iPad (our district's 1:1 device) before using your content with learners in the classroom. Often, I add to a "sandbox course" and login to Schoology on my iPad to access materials. This way, I can make sure that the resource can be viewed and plays well with the embedded content strategy I am using to display it.
Some sites and resources I like using when thinking about interactive embeds in Schoology:
Have more questions or need more inspiration? Reach out to your DLC for more support!
